Additional Advanced Transfer
BloodyRain2k opened this issue · 1 comments

I was messing around with how to do the most effective transfer to Eeloo from Kerbin without having to way 1 1/2 years for the encounter.
So I tried various timings with Porkchop and well, the best I could get was around 280d transit with a pretty hard braking at the encounter, dV needed just for the encounter alone was over 2.5k.
Cheapest btw was ~2k but 1y 111d transit.
Then I tried something different which Scott Manley mentioned probably more than once in his videos: get your Ap to near escape, then do the actual ejection burn at Pe.
And guess what, the whole transfer to Eeloo was now doable with 1.2k dV from a 83000km orbit and a 75k Pe burn. Transist was a lot longer with 325d BUT since I cut the dV in half that leaves way more room for going aggressive.
Now for the problem with this transfer: it is IMPOSSIBLE to manually plan when to do it.
The problem is that you need to do a near ejection burn at a time where the actual burn happening at the next Pe ejects with Kerbin's prograde/retrograde and there is simply no way to hit this sweetspot due to how the orbits are shown.
The first thing I tried obviously to get it working as a Proof of Concept was to use Porkchop to tell me the timing for the burn but well, since it's impossible to get the ejection matched to Kerbin's prograde it wasn't doable.
So I wanted to suggest that this way of transfering could be added to the advanced transfer modes as an alternative to Porkchop.
It might be even able to reuse the same UI since the only difference should be that it'd set up 2 nodes instead of 1.
There should also be an option for choosing whenever or not you want to do a near ejection burn from your current orbit or just drop from your current orbit to 75km for the actual ejection burn.
The reason being that if you have excessive dV or simply don't care you can skip going to a 83000km orbit where you could top of the fuel before doing the transfer in case you do not have excessive dV.
There's little difference between these two ways of doing it, dropping from 83000km to 75km costs 180dV, getting to 83000km costs 900dV with dunno what it was for circulation, not much anyways.
The fuellogistics part is where they differ much.
In the end both do the same: get the first near-ejection burn timed so that the second burn at the next Pe results in an ejection with Kerbin's prograde/retrograde into the targeted Ap/Pe.
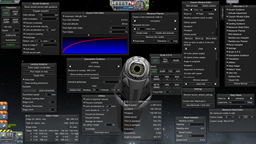
Here's two images of the mentioned 83000km => 75km burn, dropping to 75km costs 180dV and the actual ejection was around 1050dV.
http://imgur.com/a/Byk2r
I was thinking about making a mockup module for adding this in but then remembered that I can barely do math, but definitely not orbital mechanics math ._.
Even though the hardest part should be timing the 1st burn so the 2nd burn at Pe is with Kerbin's prograde/retrograde.