Batty's Coordinates PLUS! Mod
NOTE: This mod does not run with Forge.
For my Forge-compatible version of the mod, see this page.
Combines Batty's Coordinates, Stopwatch Timer and Info Panel
Batty's Coordinates

The X, Y and Z coordinates that locate the player's position in the world are normally displayed on the F3 Debug screen.
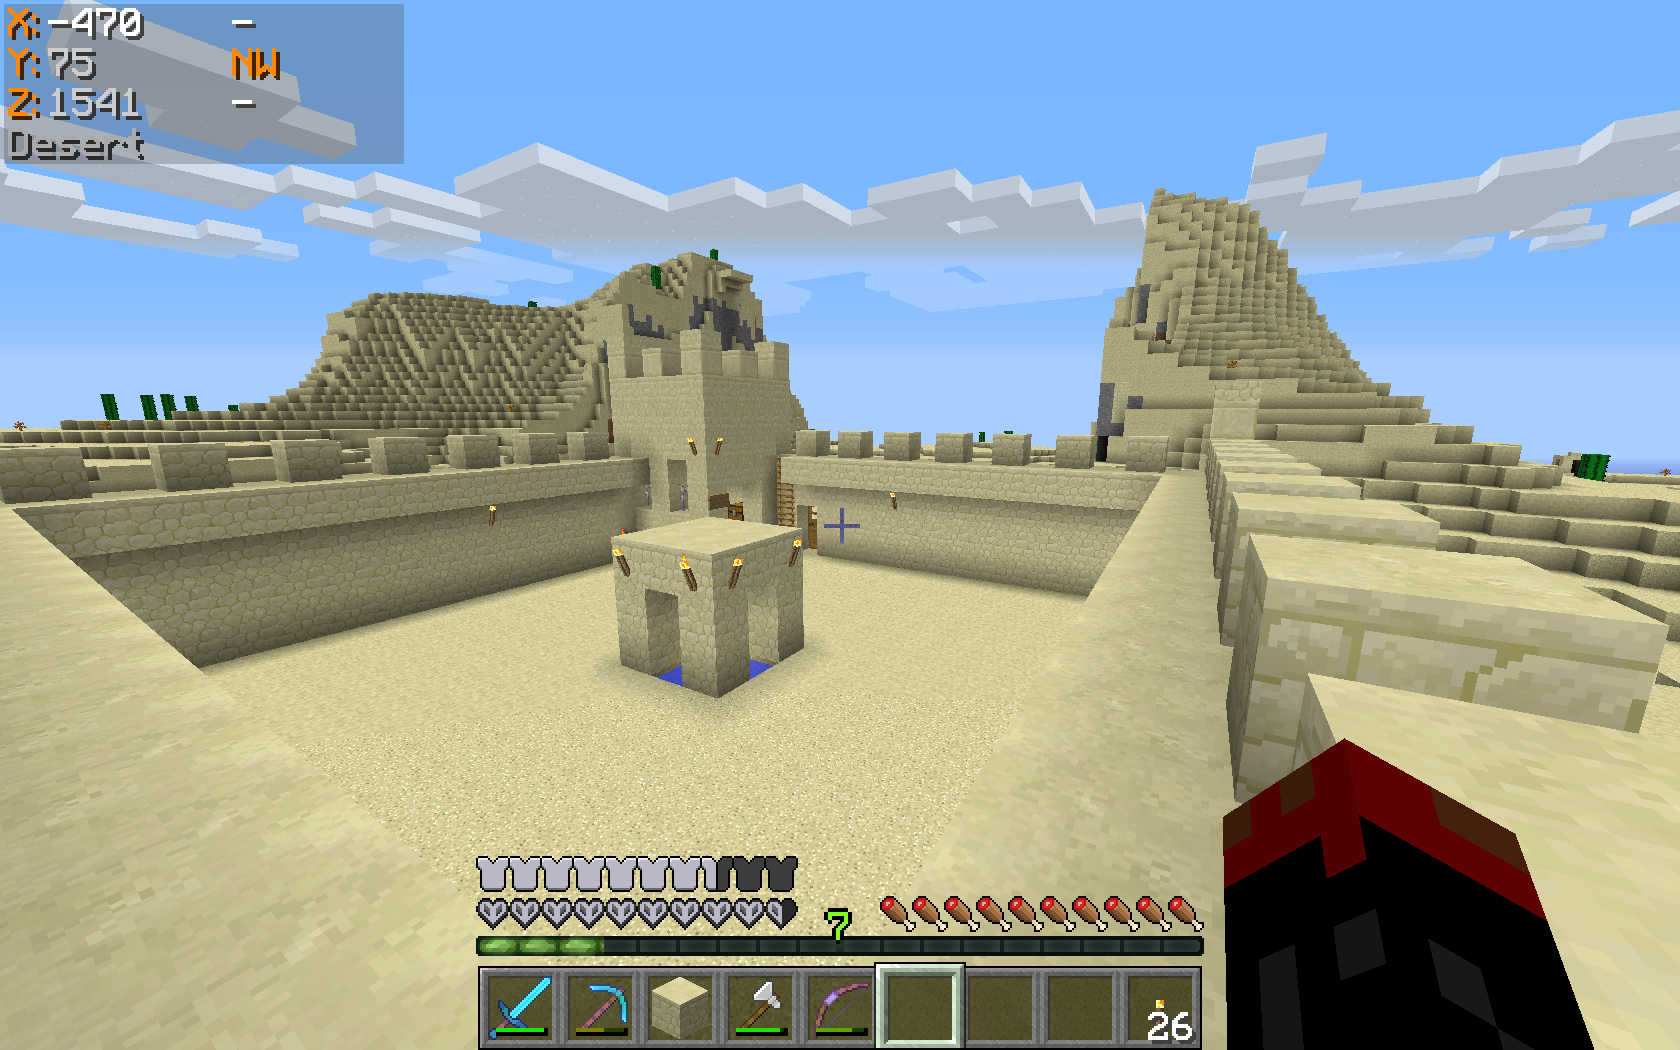
This mod has a number of display modes that present this information, and more, discreetly in a corner of the main game screen, so you don't have to leave F3 open to see them.
In Mode 0 the Coordinates are hidden.
Mode 1 shows the X, Y and Z coordinates, and it also indicates the direction that you are facing, in compass-direction terms.
Mode 2 adds an indication whether your X and Z coordinates will Increase or Decrease if you move in the direction you are facing.
Mode 3 also shows the Biome that you are currently in, displayed below the coordinates.
Mode 4 adds the Minecraft Day counter, shown as 'dy'.
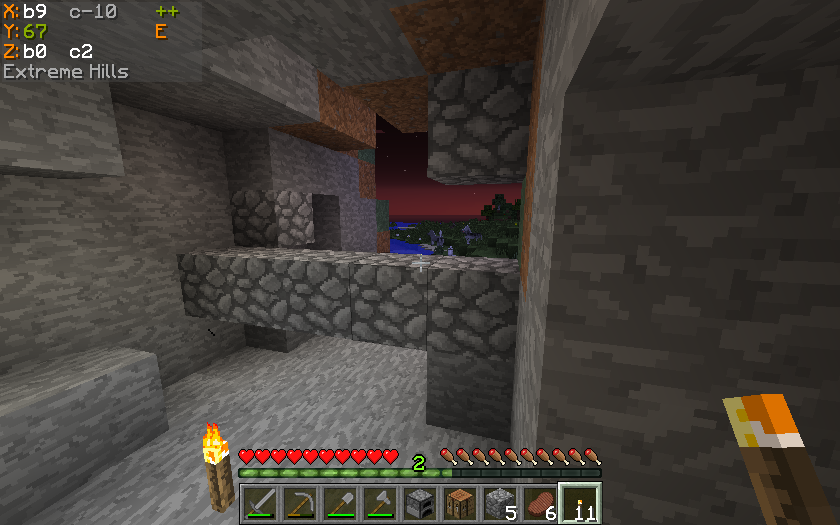
Mode 5 replaces the normal X, Y and Z coordinates with Chunk information:
This shows which Chunk you are in, and which Block within that Chunk
The display appears with the Chunk being denoted by a 'c' and the Block by a 'b', for example:

- means
*X = Block 9 within Chunk -10 *Z = Block 0 within Chunk 0
Batty's Stopwatch Timer

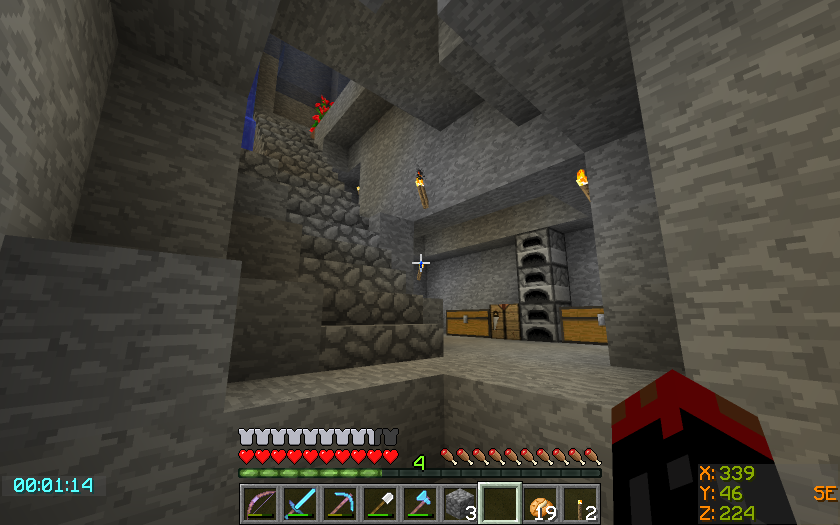
A discreet timer tucked away in a corner of the screen, that you can hide, reappear, stop, start and zero using key presses.
Can be used to time activities in-game. Useful for speed challenges.
Shows the time passed in hours, minutes and seconds.
Colour-coded so you know at a glance if it is stopped or running.
Info Panel
This display will show either the FPS, the Block Light-level or the Moon phase. You can switch between these at the press of a button.
FPS Display
The Frames per Second that the game is running at is displayed in a corner of the screen.
Block Light-level
The block light (i.e. artificial light reaching this block) of the block the player is standing on is displayed
Moon phase
An icon, showing the current phase of the moon, is displayed.
Video Spotlight
A Mod Spotlight (covering all variations of my mods) by EddCase and OddyC of TheMobCave.
Controls
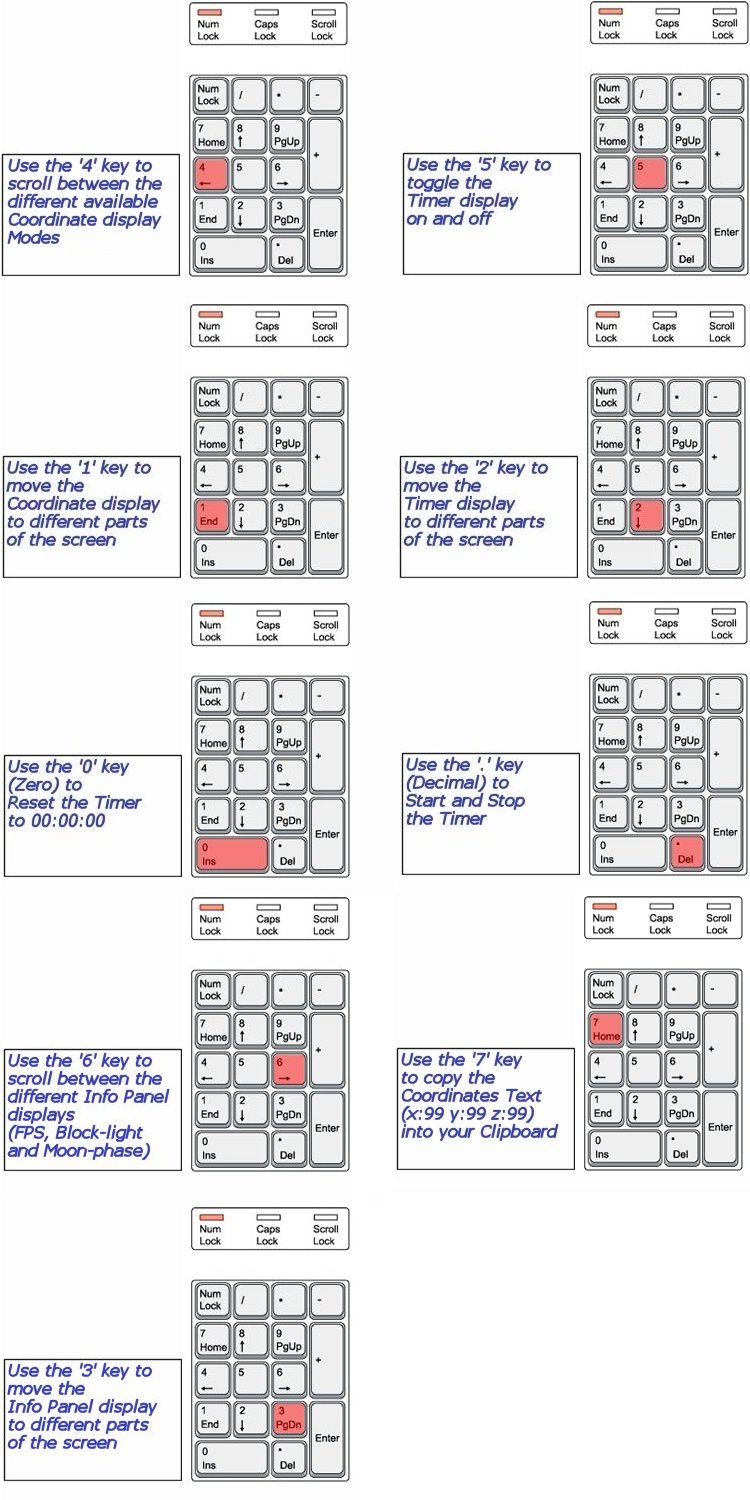
From version 1.7.2_2.5.0 the Controls have been completely revamped
All controls use keys from the NumPad (Be sure to have NumLock set on!)

NOTE 1 Coordinates can appear:
- Top Left
- Top Right
- Bottom Right
NOTE 2 Timer can appear:
- Top Left
- Top Centre
- Top Right
- Bottom Right
- Bottom Left
NOTE 3 The Info Panel can appear:
- Top Left
- Top Centre
- Top Right
- Bottom Right
NOTE 4 All of the Control Keys are fully reconfigurable via the Options Menu in-game
NOTE 5 Screen locations and display modes are remembered when you quit Minecraft
Forge
If you use Minecraft Forge, be sure to check out Batty's Coordinates PLUS! Mod for Forge
Custom Colours
You can customise the colours in which Batty's Coordinates and Timer appear on the screen.
This done by creating a small file called BatMod.properties in your .minecraft folder.
If this file is not present, the displays all appear in the default colours.
The following lines are permitted in the file:
-
- Coords.shade = <true or false>
- Coords.chars.Increase = <any character>
- Coords.chars.Decrease = <any character>
- Coords.colours.TitleText = <colour from the list>
- Coords.colours.PosCoordText = <colour from the list>
- Coords.colours.NegCoordText = <colour from the list>
- Coords.colours.PosChunkText = <colour from the list>
- Coords.colours.NegChunkText = <colour from the list>
- Coords.colours.CoordText = <colour from the list>
- Coords.colours.CompassText = <colour from the list>
- Coords.colours.BiomeText = <colour from the list>
- Coords.copy.tpFormat = <true or false>
- Timer.shade = <true or false>
- Timer.colours.Stopped = <colour from the list>
- Timer.colours.Running = <colour from the list>
- Info.shade = <true or false>
- Info.colours.FPS = <colour from the list>
- Info.colours.Bright = <colour from the list>
- Info.colours.Dim = <colour from the list>
- Info.colours.Moon = <colour from the list>
NOTE 1: PosCoordText and NegCoordText can be used to distinguish positive and negative coordinates from each other by giving them different colours
NOTE 2: You can still use CoordText, and this will override anything you put in PosCoordText and NegCoordText
NOTE 3: You can choose the character that indicates whether your coordinates are increasing or decreasing in the X or Z directions. By default these are '+' and '-', but by use of Coords.chars.Increase or .Decrease you can substitute another character.
NOTE 4: You can choose the colours that the Chunk Coordinates display, positive and negative
NOTE 5: You can decide to copy the Coordinates to your clipboard in standard format "x=999, y=99, z=999" or in /tp command format "999 99 999" by the Coords.copy.tpFormat parameter. Setting this to true will make it use the /tp command format.
NOTE 6: Info.colours.Dim chooses the colour that light-levels of 7 and below will display, while Info.colours.Bright chooses the colour that light-level of 8 and above will display.
The full list of recognised colours:
(*Note* that you must type all of the entries exactly as they appear here - capitals and lowercase - or they will be ignored and the default colours will be used by the game)
Click Here for a sample file that you can use as a start-point for changing colours.
Compatibility
Batty's Coordinates PLUS! mod makes changes to these Minecraft internal classes:
- GuiIngame.class
- GuiIngameMenu.class
- Minecraft.class
It also adds its own class:
- BattyUI.class
It will conflict with any other mods that you install which modify the same classes.
Optifine does not touch these classes, and so should be completely compatible.
Installing
This is a very basic mod and is installed either by editing the appropriate Minecraft jar file or by using apps e.g. MagicLauncher, MultiMC
using MagicLauncher
- Add Batty's Coordinates PLUS! as an external mod to a MagicLauncher profile
- Find the zip file that you downloaded.
- Run as normal.
editing Minecraft jar(1.6 onwards)
- make a new folder in the %appdata%\.minecraft\versions\ folder
- in this example, assume you have called this "1.7.2-UI" (Note Minecraft does not recognise names that contain spaces)
- copy the entire contents of the "1.7.2" folder into "1.7.2-UI"
- rename the 1.7.2.jar to 1.7.2-UI.jar and 1.7.2.json to 1.7.2-UI.json
- open the 1.7.2-UI.jar with an appropriate tool (e.g. WinRAR, 7-zip)
- delete the META-INF folder (this is VERY important)
- open the zip file that you downloaded containing my mod
- copy all of the zip file contents
- paste the zip file contents into the 1.7.2-UI.jar, replacing the classes in the this jar with the equivalent classes from the zip file
- edit the 1.7.2-UI.json file, changing the id to "1.7.2-UI"
- NB delete the "client" subsection of the "downloads" section in the json file. Prevents newer launchers from re-downloading vanilla jar over your modded jar.
- set up a profile for this new jar using the new Minecraft Launcher
(NOTE: In the new Mojang Launcher - Jan 2017 - you have to check "Advanced Settings" in the "Launch Options" tab to set up a new profile) - run Minecraft from this new profile
I made a short tutorial video to illustrate this process (Note that this refers to outdated versions of Minecraft):
