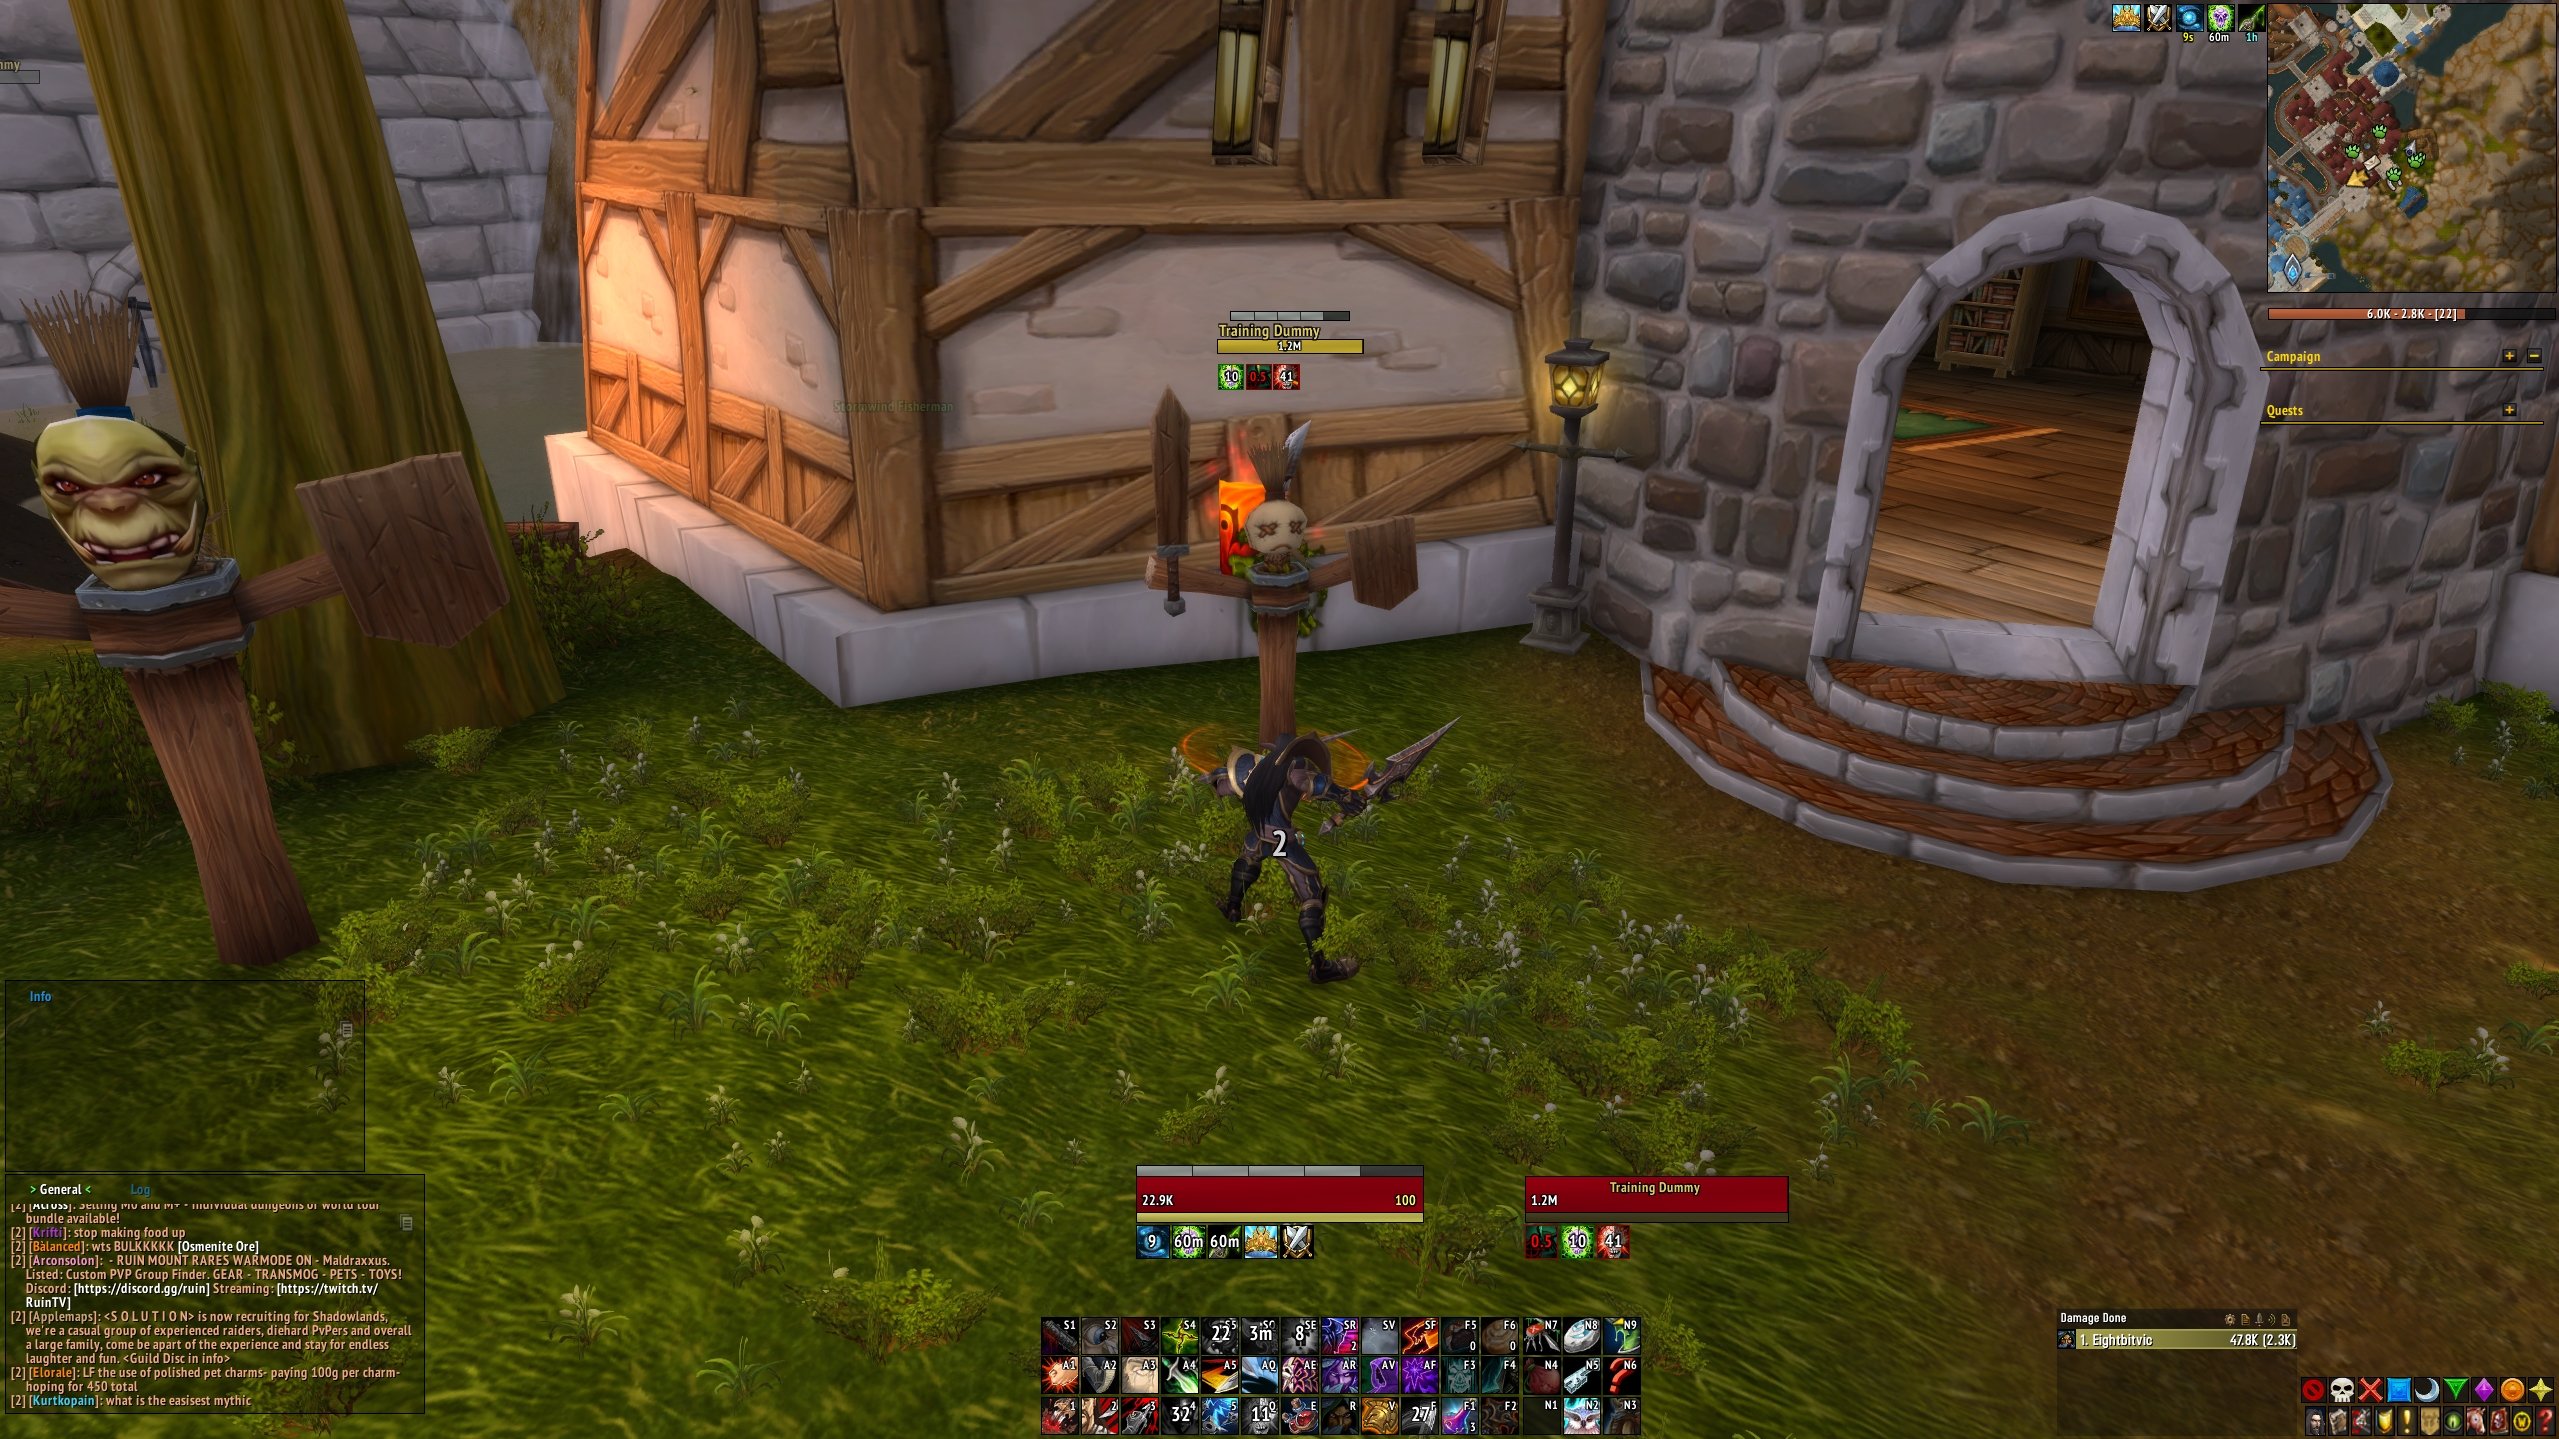
This is a clean ElvUI profile designed for all World of Warcraft content. It is configured for 2560x1440 at 0.64 scale but should work on any resolution if you adjust the scaling. If it's too small for your monitor you can also adjust the scaling then rearrange the elements by pressing Esc -> ElvUI -> Toggle Anchors.
Profile Installation Guide:
1. Download ElvUI and install it by extracting the ElvUI and ElvUI_OptionsUI folders into your World of Warcraft addon folder (default path is C:\Program Files (x86)\World of Warcraft\_retail_\Interface\Addons).
2. Once you launch World of Warcraft and login with a character an installation pop-up should appear. If not, press Esc, click ElvUI, then click Install at the bottom of the ElvUI settings window.
3. On the first page of the installation window click Continue, click Setup CVars, click continue, click Setup Chat, then click Continue until you get to the last page of the installation wizard and click Finished.
4. After the UI reloads press Esc -> ElvUI, click the Profiles tab on the left, click Import Profile near the top right of the page, and in the pop-up window paste the import string that you copied from the Wago profile page, then click Import Now.
5. Select the imported profile name from the Profile dropdown menu, close the ElvUI settings window, then press Ctrl+V to turn on the name plates.
6. Lastly, right click on the General chat tab, click Unlock Window, and drag it into the bottom left chat panel, then right click General again and click Lock Window. Do the same for the Loot/Trade window except drag it to the chat panel above the first one. You can also rename each tab, add new tabs, and change your chat settings by right clicking on the tab you want to modify.
Nameplate Buffs and Debuffs are enabled by default but can be disabled by pressing Esc -> ElvUI -> NamePlates -> Friendly Player/Enemy Player/Enemy NPC -> Buffs/Debuffs, and unchecking Enable.
Nameplate Target Classbar (class resources such as combo points) are enabled by default, to disable press Esc -> ElvUI -> NamePlates -> Target, and uncheck Enable under Classbar.
The Data Bars below the minimap can be enabled or disabled by pressing Esc -> ElvUI -> DataBars, then going to that specific Bar's tab. They can be rearranged by pressing Esc -> ElvUI, and click Toggle Anchors in the bottom left, then Lock in the center of the screen when you're done moving them.
If the arena frames aren't showing while in Battlegrounds or Arena, press Esc -> ElvUI -> UnitFrames -> Disabled Blizzard Frames, and uncheck Arena, click Accept in the prompt to reload your UI, recheck Arena, and click Accept again. If any of the default Blizzard frames still show afterwards, enter /reloadui in chat to fix it.
Action Bar 4 is setup for 9 buttons adjacent to the other 3 bars and can be disabled by pressing Esc -> ElvUI -> ActionBars -> Bar 4, and unchecking Enable.
Action Paging is disabled with this profile which means that action bar abilties will stay the same regardless of what stance you're in. If you'd like to use the default Action Paging settings go to Esc -> ElvUI -> ActionBars -> Player Bars -> Bar 1/2/3, and click Reset Action Paging in the top right.
There is also a short guide on Action Paging below which includes paging settings for Druid.
Action Paging Guide:
Action Paging changes the abilities displayed on each bar depending on certain conditions, typically different stances. There are 10 Action Paging Bars available to be assigned, and they don't change the position or hotkeys of your Action Bars, only the displayed abilities in those slots.
To view or modify each bar's Action Paging press Esc -> ElvUI -> ActionBars -> Player Bars -> Bar 1/2/3 etc., and scroll down to the Action Paging text input area.
The formula for the action paging bar to be displayed with each stance is the following:
[stance: x] y;
Where y is the action paging bar to be displayed while in stance x. You can see which stances are allocated to which numbers via this Wowpedia article.
Note: the default paging is out of order and certain bars are reserved for certain stances, so if you modify the Action Paging of any of the bars I highly recommend modifying it for all bars you have enabled.
For example, if you have Bars 1-3 enabled and want them to always display Paging Bars 1-3 regardless of what stance you're in you could use the following formula:
Bar 1 Action Paging:
[stance: 0] 1; [stance: 1] 1; [stance: 2] 1; [stance: 3] 1; [stance: 4] 1;
Bar 2 Action Paging:
[stance: 0] 2; [stance: 1] 2; [stance: 2] 2; [stance: 3] 2; [stance: 4] 2;
Bar 3 Action Paging:
[stance: 0] 3; [stance: 1] 3; [stance: 2] 3; [stance: 3] 3; [stance: 4] 3;
Another example would be if you wanted Druid Cat and Bear form to have their own Bars 1-2 and share Bar 3, you could use the following formula (with Default stance, Travel, Tree, and Boomkin all sharing the same bars, although paging bars 8-10 could be used for those stances as well):
Bar 1 Action Paging:
[stance: 0] 1; [stance: 1] 4; [stance: 2] 5; [stance: 3] 1; [stance: 4] 1;
Bar 2 Action Paging:
[stance: 0] 2; [stance: 1] 6; [stance: 2] 7; [stance: 3] 2; [stance: 4] 2;
Bar 3 Action Paging:
[stance: 0] 3; [stance: 1] 3; [stance: 2] 3; [stance: 3] 3; [stance: 4] 3;
My Other Addons:
CurseForge addons are also available in the desktop app.
